Attacks with ransomware virus have become infamous for the disastrous consequences it has for computers (their files) and for the tremendous impact they have had in recent cases, such as the one known as “WannaCry”. The result of these infections is always the hijacking of information, that is, the encryption of all the content of the computer and its possible recovery in exchange for paying some money as a ransom to the attacker.
From the version known as “Fall Creators Update” or also known as version 1709, the protection system of Windows 10 has a tool capable of protecting entire folders in order that no program can modify its files unless we give it express authorization.
Requirements to enable anti-Ransomware protection in Windows 10
1.- Have updated Windows 10 at least to version 1709 or Fall Creators Update.
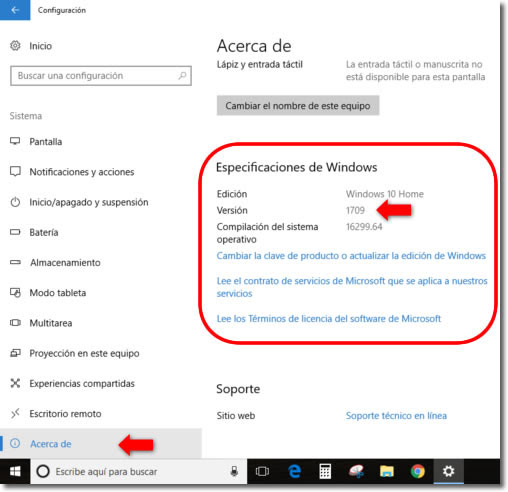
- To know the version of Windows 10 that we have installed, we can follow the following sequence: “Windows icon> Settings> System> About> Windows specifications> See Version“
- If we do not have this version, we can consult this article of Windows help where they explain everything related to this update.
2.- Have the Windows Defender security system active. It is something that is activated by default, but just in case, you can check it in: “Windows icon> Settings> Update and Security> Windows Defender“. Going into its configuration, we will see which sections are activated and which are not.
In addition, we must see the corresponding icon in the form of a shield in the lower bar of the desktop, in the series of small icons on the right.
How to activate anti-Ransomware protection in Windows 10
his protection is NOT activated by default, at least in the current version of Windows 1709, so if we are interested, we must activate it ourselves and configure it properly.
The files of the folders that we include under this protection cannot be modified by any program, neither legitimate nor malicious. Later we will see how we can allow some programs of our confidence to use them and modify them.
We must access the Windows Defender Security Center.
We can do it directly from the small shield icon in the lower right bar or through “Windows Icon> Settings> Update and Security> Windows Defender“
Once there, we will enter the Anti-Virus and Anti-Threat section.
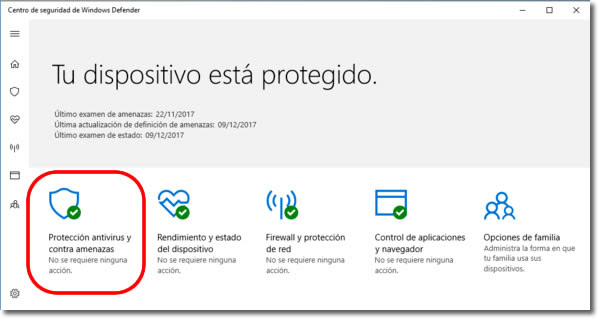
Now we will look for the section Antivirus and protection against threats and we will click on it.
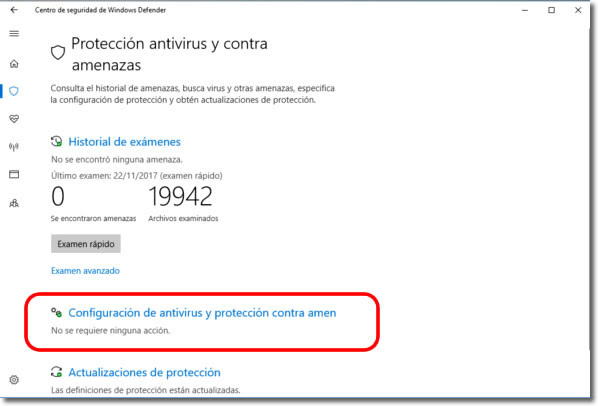
In the page that opens we will review that we have activated the first options (recommended) and we will look for the section Control the access to the folder. It will appear inactive if we have not activated it previously. We will have to change the selector to blue to add this protection.
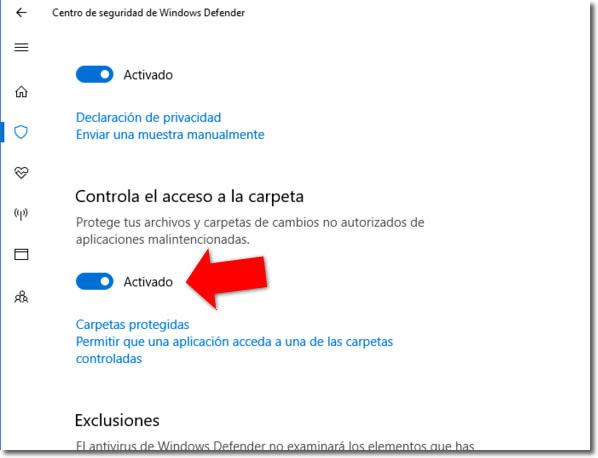
How the protection tool works
When activated, we will automatically protect the common folders where we normally host our files. We can see them through the section Protected folders.
They will be…
- Documents
- Images
- Music
- Videos
- Desktop
- Favorites
But we could have some other folder outside of these, even in some external unit, that we also want to protect. To do this we only have to click on the + sign of Add a protected folder and select the folder in question through the browser that will appear.
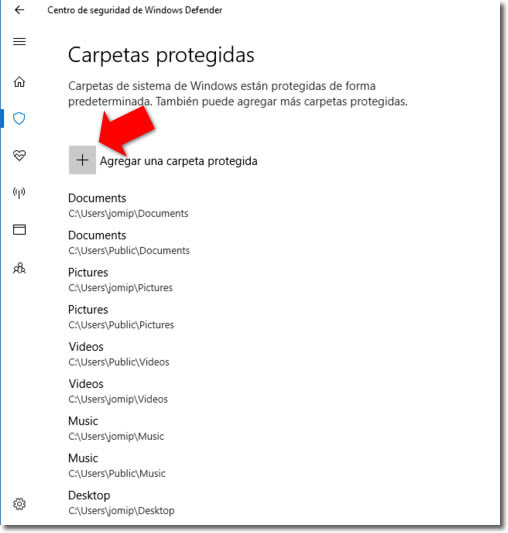
The folders selected by default for protection cannot be unprotected. If we want to unprotect one added by us, we just have to click on it so that we can see the possibility of eliminating it.
If we try to open a file of these folders with some program, Windows will warn us by means of a notification on the side that the changes are not authorized.
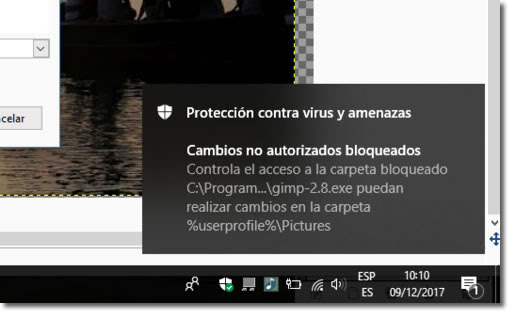
In the example of the image we see how Windows prevents Gimp, a free software program for image editing, to use the files that we have stored in our folder Images (Pictures)
Authorize trusted programs to use protected folders
If we want to give permission to some of our programs, because we know they are reliable, we must enter the options in the section Allow an application to access one of the controlled folders that we will see in the previous section.
Although it is not a complicated task, some inexperienced users may get lost in this step, so they may need some external help.
Through the file explorer we must reach the location where the executable of the program we want to authorize is saved.
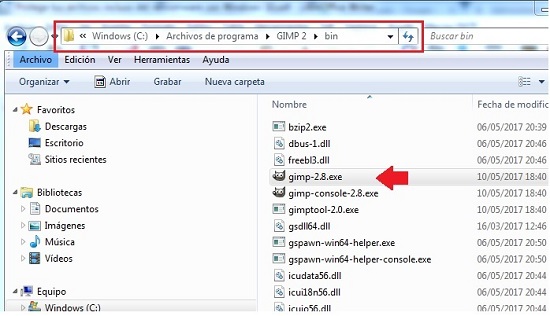
In the example of the image we see that our Gimp program executable, which could not use the files, we now find in the path C:\Program Files\GIMP 2 \bin
Once we have given authorization, we can use this program to open and modify the files of the protected folders.
The executables of the programs can usually be found within the folders: C:\Program Files or C:\Program Files (x86). We only need to select the correct file and accept.
